Acer monitors are a big name brand in the computer monitor industry and are known for their longevity. Whether you’re planning to use a floating mount or if you are packing your Acer monitor away, you will firstly need to remove the stand of the monitor.
Fortunately, removing the base and stand from Acer Monitors are fairly straightforward and can be carried out in only a few minutes.
Here are the steps you can follow to remove the stands from most Acer Monitors models.
Acer Monitor Stand Removal Instructions
The following guide should work for all Acer Monitor models including curved, rectangular or triangular bases. These steps will also work for Acer’s ultrawide monitor range. Touch display monitor stands vary slightly than the rest and it will be best to contact Acer for your monitor’s user guide.
Step 1 – Disconnect the Power Supply and Auxiliary Cables
Before you begin, be sure to Unplug your Acer Monitor from its power supply and detach any other cables from the Monitor (HDMI, DVI, DisplayPort, etc.).
Step 2 – Lay the Monitor on A Flat Surface
The display of the monitor is fragile and damaging the screen is something you don’t want to risk! So take extra caution when handling the monitor.
Lay a soft towel or microfiber cloth onto a table or a flat, sturdy surface. Place your Acer Monitor face down on the towel or cloth, with the base of the monitor off the edge of the table.
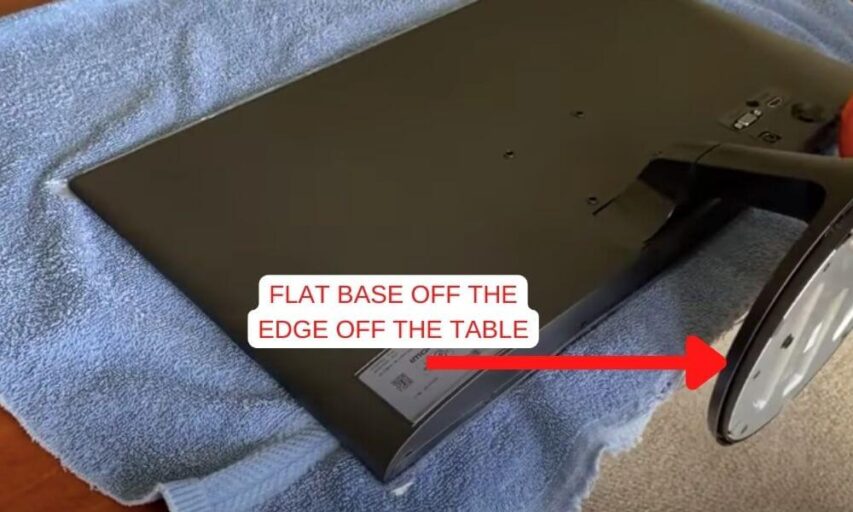
This will protect the screen from scratches or being damaged as you remove the stand.
Step 3 – Removing the Monitor Stand Base
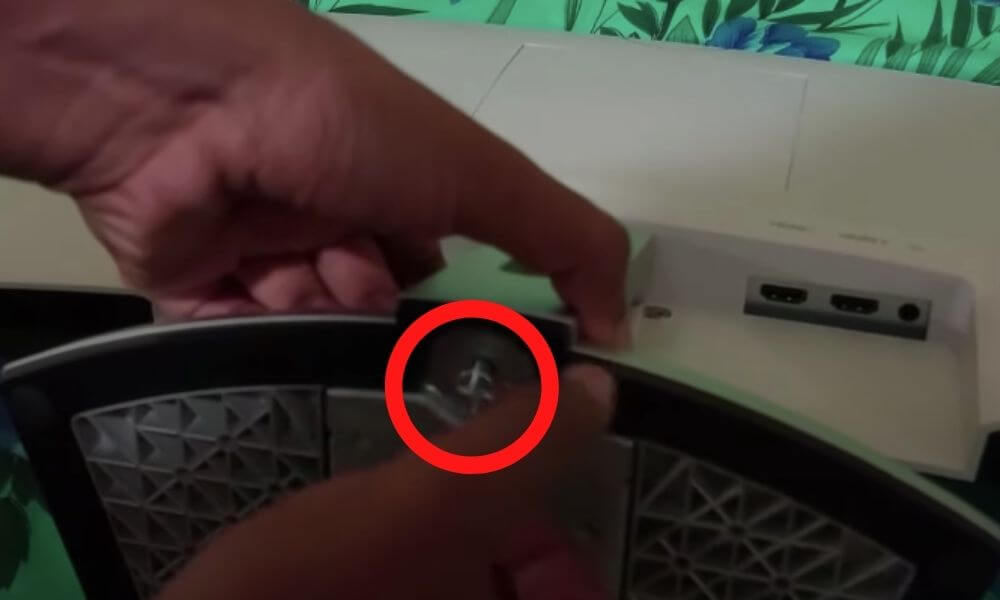
Have your screwdriver ready for the next two steps. There should be a screw in the middle of the underside of the base to remove it. Use an appropriate screwdriver to unscrew it in a counterclockwise direction to remove it. This will detach the base from the monitor stand neck. Your’s may look different from the model in the image below.
Step 4 – Removing the Monitor Stand Neck (or Body)
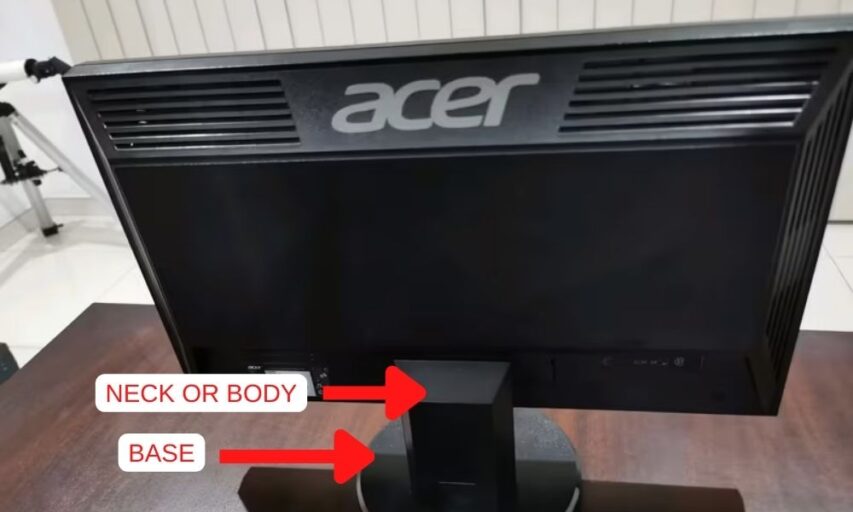
Make sure you have removed the base from your Acer monitor to give you plenty of room to remove the monitor stand neck (also called the monitor’s body).
At the top of the stand neck, if your monitor has a button or hidden tab in the center as shown in the image below then insert and press your screwdriver here and pull down gently to remove the neck and the base together.
The hidden button or tab can also be located between the monitor body and the display in some Acer monitor models. Try to simultaneously press this button (either with your finger or a screwdriver) and firmly pull the body of the stand downwards to remove it.
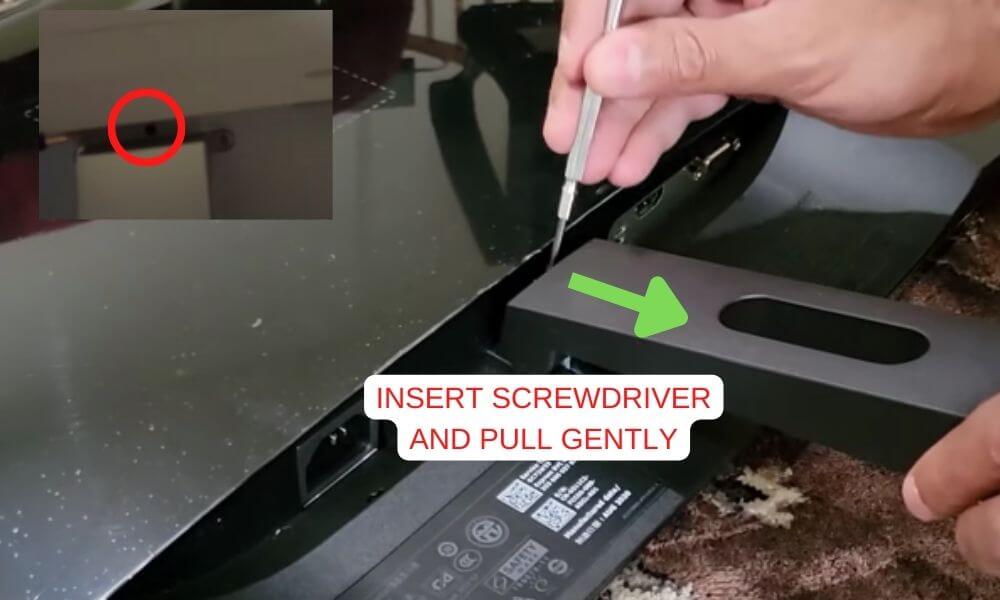
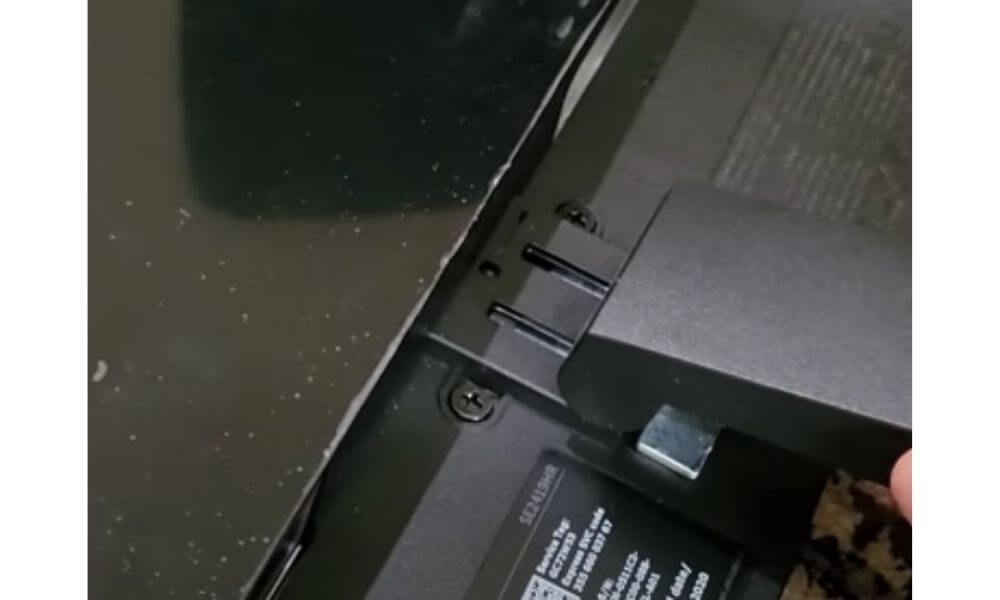
Tip: Try holding the monitor with one hand and firmly pulling the neck down with the other hand if you experience any difficulty.
Be careful not to damage the plastic backing as you do this step.
If you have trouble at this step, try also looking at Acer’s website to find the manual for your Monitor model number for instructions.
This video shows steps 3 and 4 in action:
That’s it! You have successfully taken your Acer Monitor Stand apart.
You now should have all the parts of your Acer Monitor Stand removed so you can either place it away in its box or use an alternative mount.
Tip: You should always keep your original monitor base if it’s in good condition. It can add significant resale value if you have it with you.
Conclusion
Removing the Acer monitor stand can be difficult with certain models. Fortunately, you can follow these steps which work on most Acer Monitors:
Acer Monitor Stand Removal Process:
- Disconnect power supply and auxiliary cables.
- Lay the monitor screen on a flat surface.
- Use a screwdriver to loosen the underside of the monitor’s base.
- Use a screwdriver to press a hidden tab and simultaneously firmly pull the monitor’s stand body downwards.
If you experience any trouble in getting your Acer monitor stand removed, try looking at Acer’s support community website and search up your Monitor model number for instructions or call Acer’s support at 1-866-695-2237.
Hopefully, this guide was helpful to you and you successfully removed your Acer Monitor stand.


